Droplets (Windows, PSE 6+)
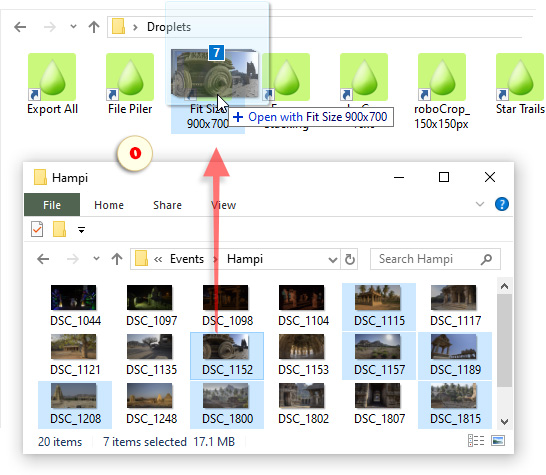
![]() "Droplets" provide a quick and intuitive way to apply scripts to pictures. You just drag one or more image files onto the droplet icon and... it's done! (fig. 0)
"Droplets" provide a quick and intuitive way to apply scripts to pictures. You just drag one or more image files onto the droplet icon and... it's done! (fig. 0)
If you like such an approach let's discuss it in more detail.
1. First, you have to create a script-based droplet:
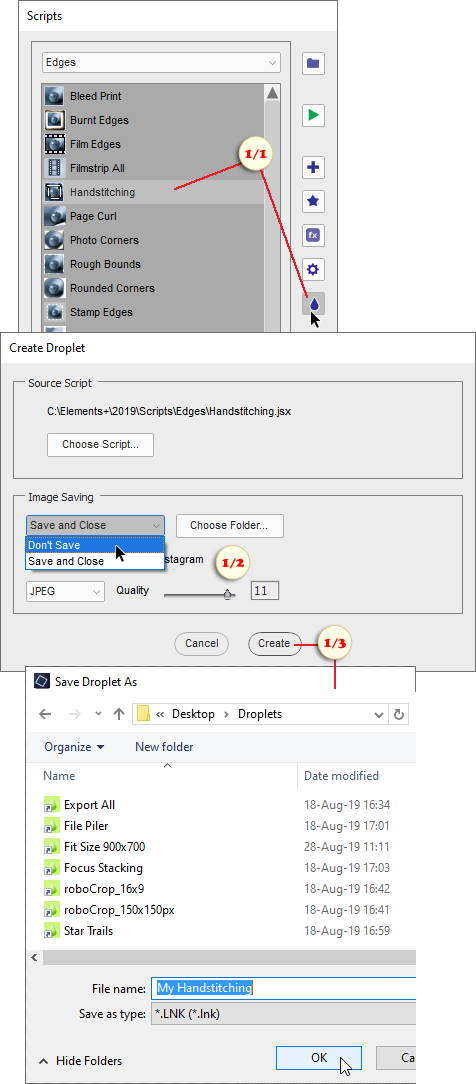
- Select a script in the E+ catalog and click the "droplet"-button (fig. 1/1),
- in the dialog that opens, define what to do with the edited images -- either save to a specified location or not to save and leave the documents opened in PSE Editor (fig. 1/2),
- press "Create" button, choose target directory and specify the droplet name (fig. 1/3).
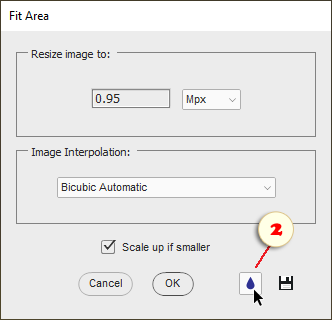
2. Many scripts in the E+ catalog open dialogs for modifying user settings. To create a droplet from such a script, use the "droplet"-button at the dialog bottom (fig. 2).
The created droplet remembers the current settings and, later on, applies those without opening any dialogs. If necessary, you can make several droplets based on a single script, with different settings for different tasks.
3. Some scripts of the E+ catalog create a new document from multiple images. Droplets based on such scripts inherit the same logic.
For example, by dropping several files onto "File Piler" droplet we combine them in a single document as layers.
Other scripts of this kind:
- Filmstrip All,
- Focus Stacking,
- Noise Stacking,
- Star Trails.
4. To apply the created droplet, browse to it in the "Windows Explorer". Then, in the same or a different "Explorer" window, select one or more image files and drag them onto the droplet (fig. 0).
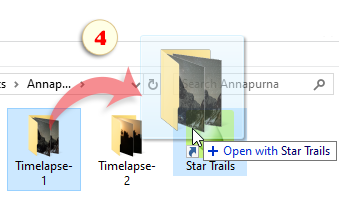
To process all the files in a specific directory, drag and drop the whole folder (fig. 4).
NB. Please, note that the Elements+ droplets are not portable. I.e., running a created droplet on a different computer is impossible.
![]() A video-tutorial on this topic is available here.
A video-tutorial on this topic is available here.


