Saving Web Pages (PSE 6+)
1. Open the "Scripts" dialog and run "Export Slices" ![]() script.
script.
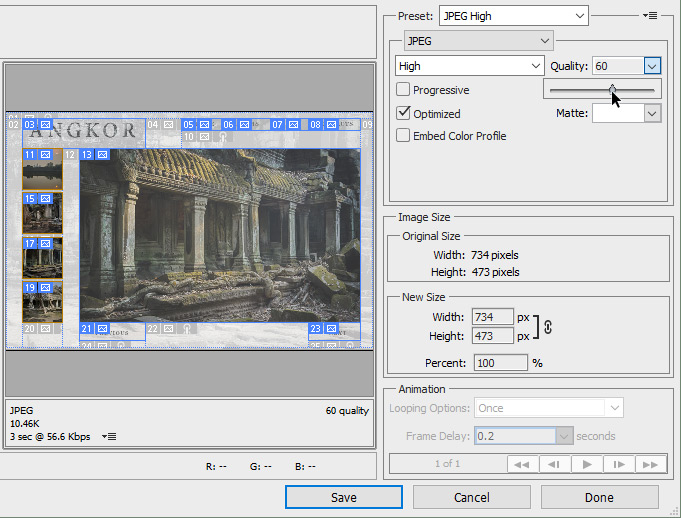
In the "Save for Web" dialog that opens, you can define optimization settings for each slice individually.
2. Click on a slice and then choose an output format and other options.
3. To edit multiple slices at once, hold down [Shift] key while selecting them.
4. Note that all the "auto" (gray) slices are linked to each other. That is by editing one of those you modify all the other auto-slices as well.
In the example shown on the screenshot, the "main photo" slice is set to 75% JPEG, "previews" -- to 60% JPEG, "text navigation" slices -- to 32-colors GIF, and the auto-slices -- to 8-colors GIF.

5. Click "Save" and -- in the next dialog -- choose the target folder for the slices.
The HTML file get saved into the specified folder as "<source-image-name>.html".
The graphic files (slices) can be found in the "images" subfolder.
NB. For more detail on slicing read the full Photoshop documentation.