About Slicing (PSE 6+)
As we know, Photoshop Elements has a lot of hidden talents. Turning images into interactive webpages is one of those.
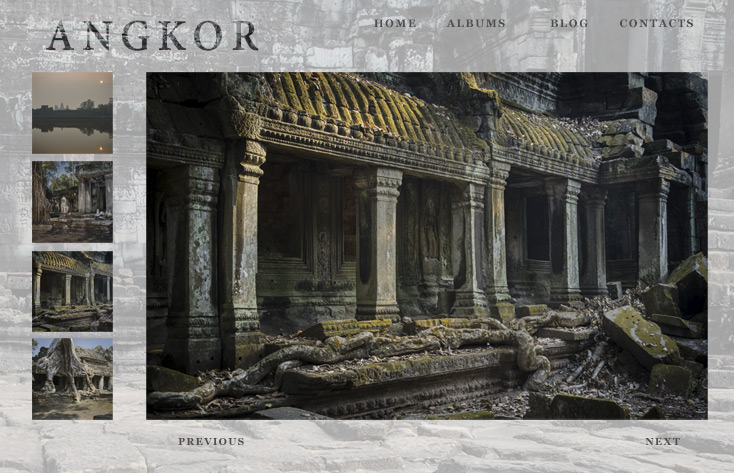
As an example, let's consider this photo album mockup below. To begin with, just save the picture as JPEG file and open it in Photoshop Elements.
Broadly speaking, the conversion workflow looks like this:
1. Dividing the image to functional pieces: the album header (slice #03), top navigation bar (slices #05-08), the main photo (slice #13), photo previews (slices #11, 15, 17, 19), etc..
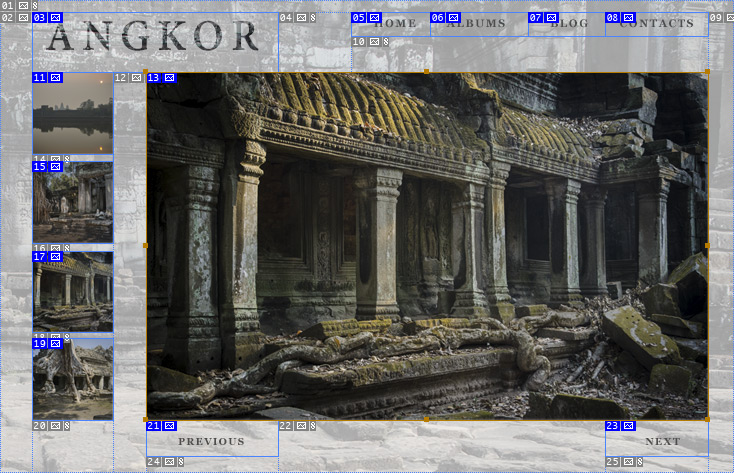
2. Assigning a URL (Internet address) to each navigation element. For instance, the slice #05 (Home) should be linked to the site's main page, while the slice #23 (Next) must lead to the follow-up album page.
3. Optimizing the page, that is defining graphic formats and other setting. Every slice may be optimized individually. For example, the main photo (slice #13) may be saved as high quality JPEG, whereas the background slices (#01, 02, 04, 10, etc.) may be exported as low quality GIFs. Such an approach allows to reduce the page total size and download time, respectively.
4. Exporting the document as HTML file and a set of images.
Eventually, you get a real webpage with working hyperlinks.