How to Slice in PSE 6-14
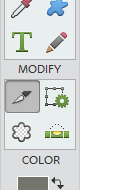
In PSE 6 through PSE 14, the Slice![]() tool is hidden in the Toolbox under the Crop
tool is hidden in the Toolbox under the Crop ![]() button.
button.
However, activating it requires a tiny workaround.
1. If you haven't loaded the extended keyboard shortcut set yet, run the Shortcuts+ script now.
2. Press [C] key twice, and voila -- the "Slice" ![]() icon appears in the Toolbox.
icon appears in the Toolbox.
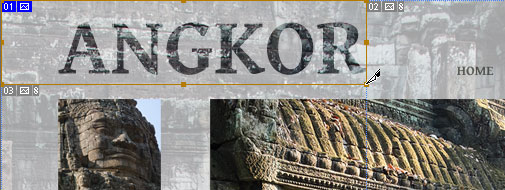
3. Drag a rectangle over a specific image area, for example, the album header.
This creates a user-slice (pictogram in its upper left corner is blue). To generate a table filling the whole document, Photoshop Elements adds several cells called auto-slices (their pictograms are gray)*.
*If you can't see the slice pictograms, open the Scripts dialog and run the ![]() "(Show Slice Numbers" script.
"(Show Slice Numbers" script.
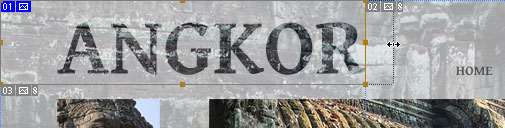
4. While the created slice is selected, it has a bounding box with transform controls. You can move or resize it with the Slice ![]() tool -- the rest of the table rebuilds automatically.
tool -- the rest of the table rebuilds automatically.
5. Cut out the rest of the page elements: the current photo, previews, text links.
Tip. While slicing your document, aim at keeping the table structure as simple as possible. That is, avoid overlapping and intermediate slices. Draw the new slices right from the border of the existing ones.
6. Press [C] key once again. The Slice Select ![]() tool's icon appears in the Toolbox. This auxiliary instrument will help you to edit the created slices.
tool's icon appears in the Toolbox. This auxiliary instrument will help you to edit the created slices.
7. Click one of the slices to select it. Then hold [Shift] key and select several more slices. Now you can align the selected slices by clicking the proper button on the Tool Options panel.
![]()

8. To use the created slices later on, save the document as PSD file.
In case the slices aren't visible in the re-opened PSD, just activate the Slice ![]() tool.
tool.
![]() A video-tutorial on this topic is available here.
A video-tutorial on this topic is available here.