Channel Mixer
 The "Channel Mixer" command lets you adjust an image by re-mixing its color channels. To use it efficiently, bear in mind the three sets of complementary colors: "Cyan - Red", "Magenta - Green", and "Yellow - Blue".
- In case the edited image is layered, select the uppermost layer.
- Apply the "Channel Mixer" command.
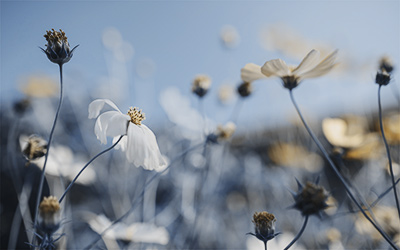
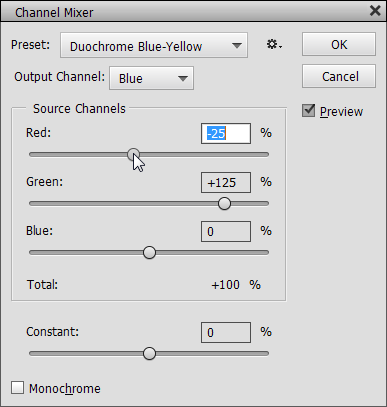
- If you haven't used "Channel Mixer" previously, begin with testing the effects available in the "Preset" menu. Just to get a general idea what this tool is about. In the example on the screenshot, "Duochrome Blue-Yellow" preset is used as a starting point for further corrections.
- To use your own adjustment settings, select the proper channel in the "Output Channel" drop menu. For example, to alter the blue-to-yellow ratio, you select the "Blue" channel.
- Try to adjust color with the "Source Channels" sliders, keeping your eye on "Total" percentage. For example, to fix a blue cast, you reduce this value; to remove yellow, you push it over 100%.
- At the bottom of the dialog box that appears, check the "Monochrome" option. The image turns grayscale.
- Redistribute luminance with "Red", "Green", "Blue" sliders to achieve the best possible tone and detail.
- If you want to colorize the grayscale image, uncheck the "Monochrome" gadget, in the "Output Channel" menu choose one of the color channels, and play with the color sliders.
The "Channel Mixer" is also a great tool for Black & White conversions:
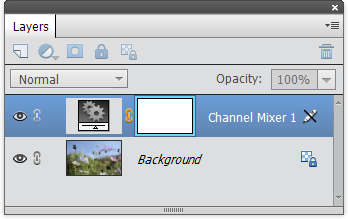
Once the "Channel Mixer" dialog is closed, your correction appears in the Layers panel as a separate layer.
If you need to modify the created adjustment layer's settings use Edit Adjustment Layer command.