Custom Shapes (PSE 10-14)
Now that you have the ![]() Pen tool, you can create new vector shapes and modify the existing ones (fig. 1). However, PSE doesn't let you save your drawing as a preset for later use. That's where E+ "Custom Shapes" come in handy.
Pen tool, you can create new vector shapes and modify the existing ones (fig. 1). However, PSE doesn't let you save your drawing as a preset for later use. That's where E+ "Custom Shapes" come in handy.
1. Display the Actions panel (Window > Actions), choose in the flyout menu "Load Actions" command, browse to "C: > Elements+ > 14.0 > Actions > Scripts", and choose "Custom Shapes.atn" set.
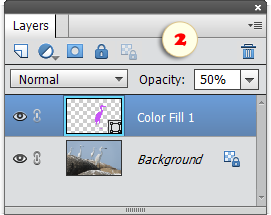
2. To save a created shape, select it in the Layers panel (fig. 2).
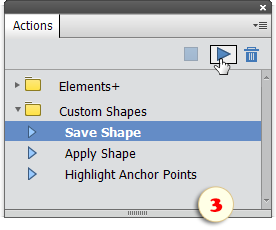
3. Then, in the Actions panel, play "Save Shape" action (fig. 3) and, in the "File name" field of the dialog that opens, enter the shape name (fig. 4).
By default, the shapes get saved to "C:\Elements+\14.0\Required\My Shapes" folder. However, you may choose any other location.
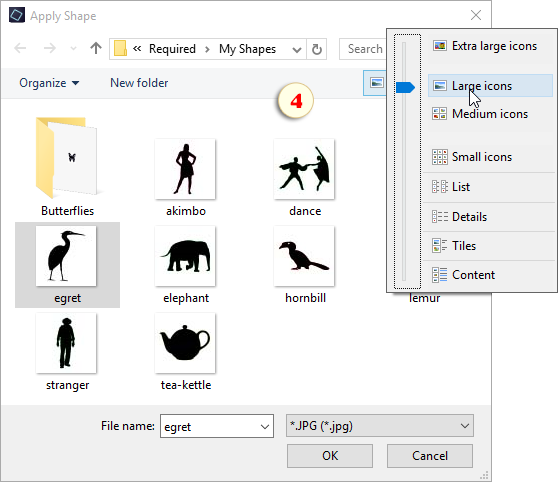
4. To put a saved shape into an image, play "Apply Shape" action and choose the desired shape in the dialog that opens.
Tip. For better preview of the saved shapes, choose in the "Apply Shape" dialog "Large icons" option (fig. 4).
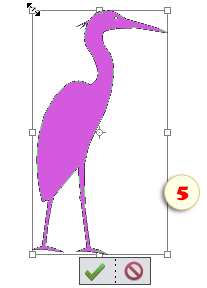
5. Adjust the shape size and position (fig. 5) and click ![]() "Ok".
"Ok".