Graduated Filter
![]() Graduated Filter feature lets you apply tonal and color corrections gradually.
Graduated Filter feature lets you apply tonal and color corrections gradually.
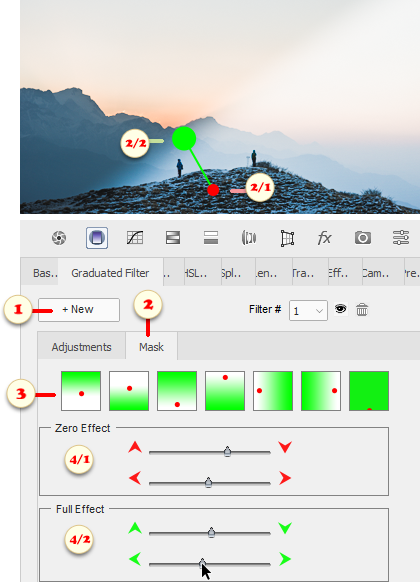
1. To create a filter, click "+New" button (fig. 1).
By default, a new filter darkens the upper part of the edited image, thus mimicking a real-life photo filter. However, its range and effect are broadly adjustable.
2. To modify the way the effect grows across the picture, select "Mask" sub-tab (fig. 2).
This invokes some visual aids over the preview. The small red dot (fig. 2/1) marks the gradient beginning; i.e., the zero-effect area. The big green dot (fig. 2/2) means the gradient end (the full effect zone).
3. To quickly change the gradient direction, click one of the "preset mask" buttons (fig. 3).
4. To customize the gradient, move its "start" and "end" points with the corresponding sliders: "Zero Effect" panel (fig. 4/1) is responsible for the red dot, "Full Effect" sliders (fig.4/2) control the green one.
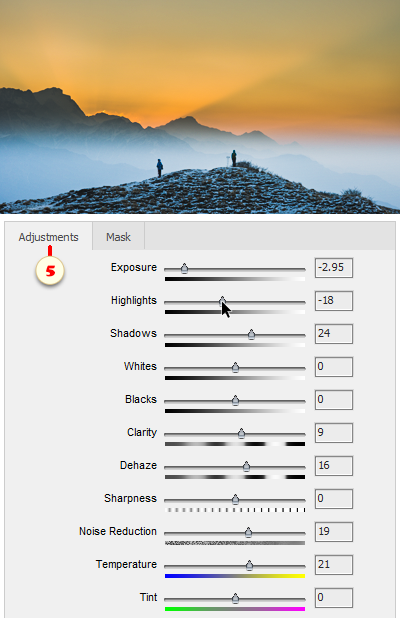
5. To modify the effect itself, go to "Adjustments" sub-tab (fig. 5) and move the sliders.
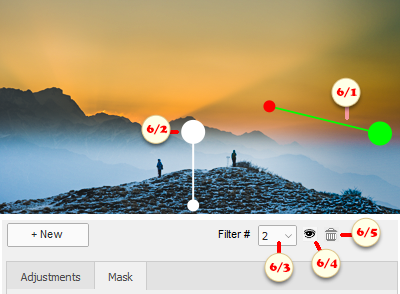
6. A single photo may have multiple graduated filters applied to it, with different effects and in different directions. For example, on the bellow screenshot the additional filter (fig. 6/1) increases contrast for the right edge of the image.
While the "Mask" tab is open, the currently edited filter is shown in red and green (fig. 6/1), whereas all the other filters are white (fig. 6/2).
To modify a non-selected ("white") filter, choose it in "Filter #" menu (fig. 6/3), and then adjust its effect or direction / mask.
To disable unnecessary filter, select it (fig. 6/3) and then hide it ![]() (fig. 6/4) or delete it
(fig. 6/4) or delete it ![]() (fig. 6/5).
(fig. 6/5).
![]() A video-tutorial on this topic is available here.
A video-tutorial on this topic is available here.