Hidden Prefs (PSE 6+)
![]() This script grants you access to some undocumented Photoshop Elements preferences.
This script grants you access to some undocumented Photoshop Elements preferences.
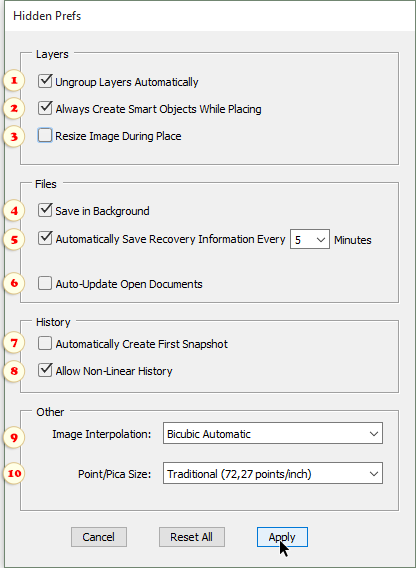
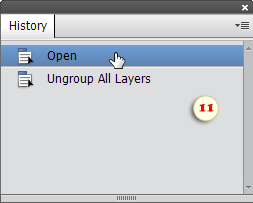
1. As we know, PSE doesn't support the layer sets. If you happen to work with such files often, check "Ungroup Layers Automatically" gadget (fig. 1) and forget about this problem. All the layers will get ungrouped right upon the document opening. If you need to restore the "foldered" layer structure just undo the ungrouping (fig. 11).
* PSE 9-14, Windows
2. By default, the "Place" commands adds an external image into the edited document as smart-object. If you uncheck "Create Smart Objects While Placing" option (fig. 2), the files will be placed as regular raster layers.
* PSE 9-14, Windows
3. "Resize Image During Place" setting (fig. 3) specifies if the placed images should be scaled to fit the edited document.
* PSE 9+
4. When editing a very big document, file saving may interrupt your work for some time. "Save in Background" option (fig. 4) lets you continue working while saving operation is performed.
* PSE 13+
5. To activate auto-recover feature, check "Automatically Save Recovery Information" checkbox and select time interval in the drop menu (fig. 5).
* PSE 13+
Please, keep in mind that this feature doesn't auto-save the original file. Instead, PSE creates a new file in the backup folder:
C:\Users\<UserName>\AppData\Roaming\Adobe\Photoshop Elements\24.0\AutoRecover
In case of PSE crash, on the next startup, you will be offered to restore the edited documents.
Important: Some users of full Photoshop report occasional failures of the automatic recovery system. So, it may be wise to not rely solely on this tool.
6. "Auto-Update Open Documents" option may come in handy, for instance, while editing a shared image file via local network. On saving changes by one user, the open document automatically updates in the collaborator's PSE window as well (fig. 6).
7. On opening an image, PSE creates a "history snapshot" allowing you to return to the initial state even if the image has been re-saved.
However, while working with very large graphic files, you may decide that the snapshot occupies way too much RAM.
By unchecking the "Automatically Create First Snapshot" gadget you make the sequence of backup states a little bit shorter (fig. 7).
8. As we know, the undo history in PSE is linear, which means, that making any changes for an "earlier" history state undoes all the "subsequent" steps.
"Allow Non-Linear History" option let the "alternative branches" co-exist in your "History" panel (fig. 8).
9. By default, for any image size changes Photoshop Elements relies on the "Bicubic" algorithm. While resampling an entire image, we may choose in the "Image Size" dialog either "Bicubic Smoother" or "Bicubic Sharper" method. In the meantime, we have no alternative when transforming a layer or selected area.
The "Image Interpolation" menu of the "Hidden Prefs" dialog allows you to choose the default algorithm for image resampling. For example, if the image upscaling is a more frequent operation in your workflow, you may want to choose the "Bicubic Smoother" method, while for the downscaling you might prefer the "Bicubic Sharper".
In most cases, though, your are safe with "Bicubic Automatic" option* that delegates the interpolation method choice to PSE (fig. 9).
* PSE 13+
10. By default, the height of a font in PSE is measured in "points". In the meantime, the point itself has two different definitions. One "PostScript" point is 1/72 inch, while one "Traditional" point is 1/72.27 inch.
Surely, in most cases, the 0,3% difference doesn't matter much. However, for the unerring precision you may specify the exact value in the "Point/Pica Size" menu (fig. 10).