Adding E+ Commands to the Effects Panel
The Effects panel also let us directly access the most helpful commands and scripts without opening the main Elements+ windows.
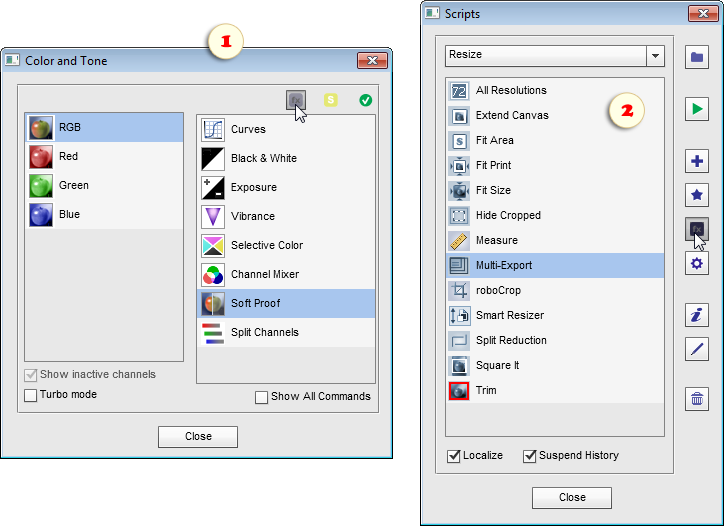
1. For adding tho the Effects a command from a E+ dialog, open the proper dialog window, choose the wanted item in the Commands panel, and click the ![]() button (if this button isn't available, the selected command can't be added to the Effects). The screenshot 1 exemplifies adding the "Soft Proof" effect.
button (if this button isn't available, the selected command can't be added to the Effects). The screenshot 1 exemplifies adding the "Soft Proof" effect.
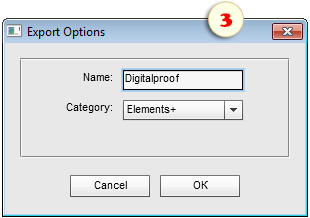
2. To add a script from the E+ catalog, open the "Scripts" dialog, select the required item in the list and click the ![]() button. On the screenshot 2, you can see adding to the Effects "Multi-Export" script.
button. On the screenshot 2, you can see adding to the Effects "Multi-Export" script.

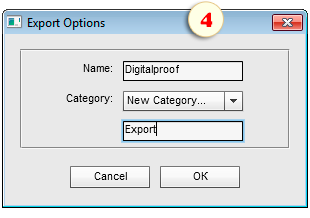
3. In the dialog that opens, edit if necessary the name that must be displayed in the Effects palette. In the screenshot 3, the "Soft Proof" command has been renamed "Digitalproof".

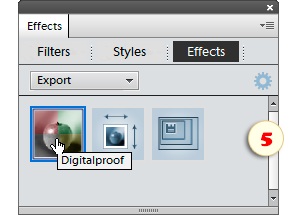
4. Also, in the "Category" menu you can choose a destination tab for the added effect. To create a new one, choose the "New Category..." item and enter the desired name in the text field that appears (fig. 4).

5. Now to make the added commands appear in the Effects panel:
- Exit Photoshop Elements
- Find the PSE localization folder
- Delete the "MediaDatabase.db3" (PSE cache-file)
- Restart Photoshop Elements and wait several minutes while the program recreates its cache file.
Tip. If you can't find the cache-file, launch the "fx Commander" script and apply the "Reveal MediaDatabase" command.
6. In the Effects palette, open the "Photo Effects" tab and, from the drop menu, choose the category the added command belongs to.
7. Apply the command by double-clicking its thumbnail (fig. 5).

See also: "Adding E+ Commands to the Actions panel".